In this section, you’ll learn more about the routing configuration tables of ZEVENET Load Balancer. We will describe how to modify the routing table behavior, add new routes, and how to delete the already existing ones.
All the tables know the subnets of already configured interfaces in the load balancer. So, from any configured table, the system can forward packets to the destination network through the same table. For example, eth0 manages the subnet 192.168.100.0/24, and eth1 manages 192.168.101.0/24. However, the tables table_eth0 and table_eth1 know the subnet of the other. That means if a packet reaches a VIP in table table_eth0 with a backend in network 192.168.101.0/24 (reachable through eth1), this table (table_eth0), which received the packet will forward the packet directly to network 192.168.101.0/24 through table table_eth0.
As said above, all the tables know about the subnet of the other tables. However, if a subnet is not known through another table, then this network may be unmanaged in the selected table.
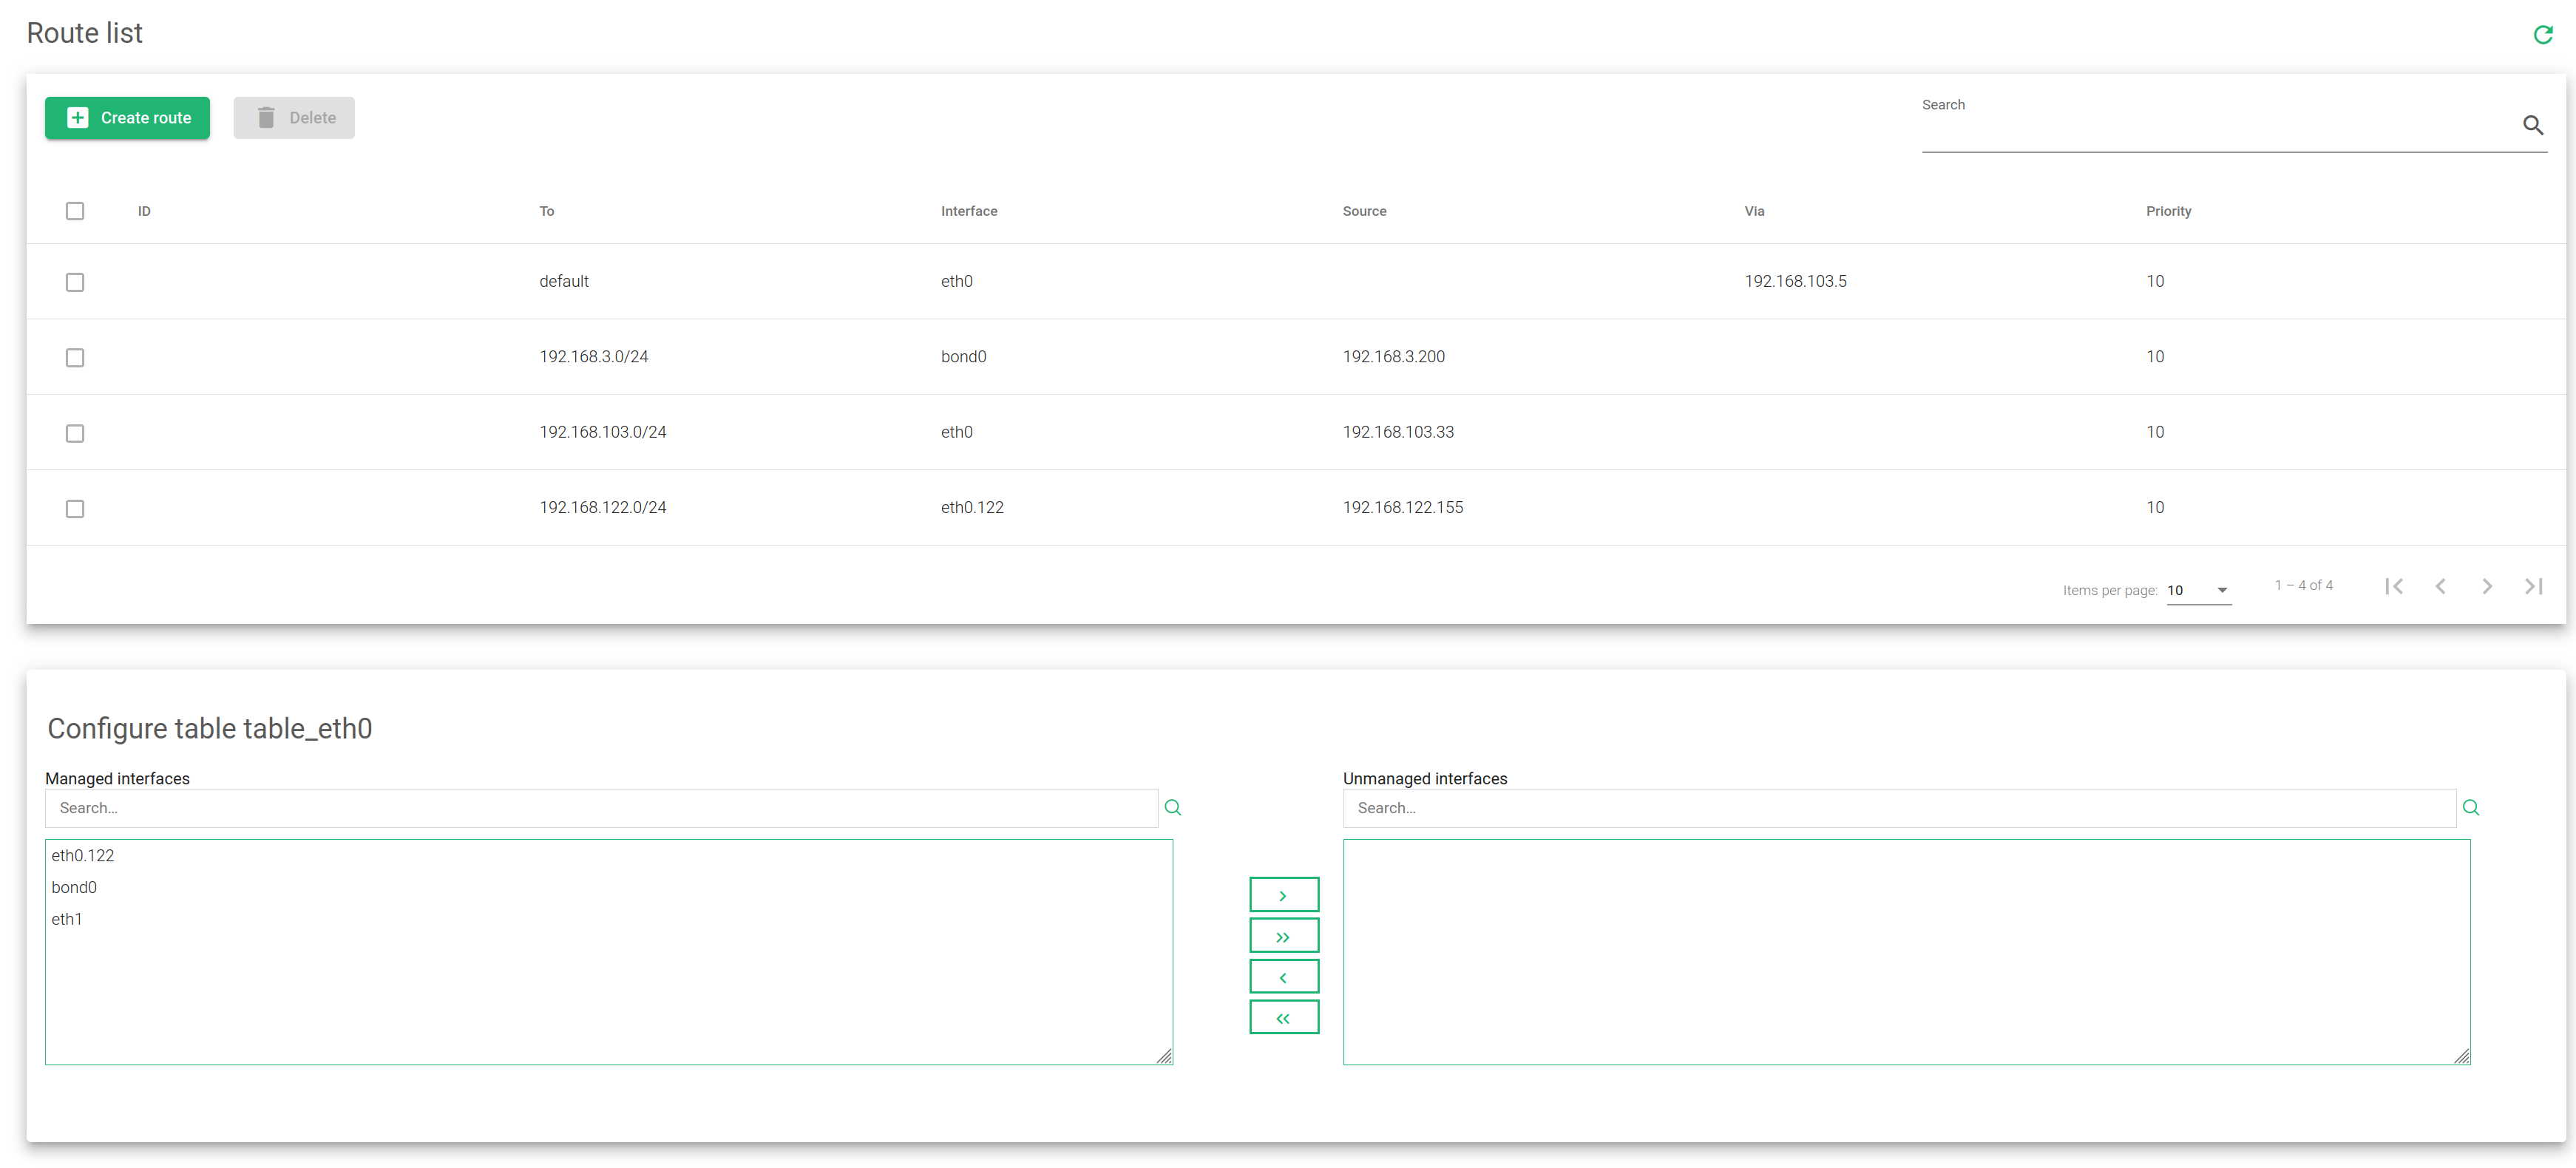
Route List
The properties for configuring the tables have been described after the image below.
ID. An internal unique identifier assigned by the system. It can’t be modified.
To. The destination CIDR (IP/bitmask) where the packet is directed.
Interface. The interface used to reach the destination previously configured in the field.
Source. The source IP address.
Via. Next host to reach the selected destination configured in the field. The selected host has to know the path to the destination and has to be in the same network as the Source.
Priority. A number that determines the strength of a rule. This value may be used to alter the verification order. The less the value, the higher the priority.
Use the following Actions to add, edit or delete a rule from the list.
- Create Route. Opens a form used to create a route.
- Edit. Changes route configurations.
- Delete. Removes route configurations and then deletes them.
Note: This view shows two groups. One called Managed interfaces and the other Unmanaged interfaces. The user may easily choose any of the interfaces to manage from the routing table. The Managed interfaces are known and used for the current routing table. The network related to the managed interface will be reached directly by the routing table instead of using the default gateway. In case it is not required to reach the network interface through this routing table, then the interface must be moved to Unmanaged interfaces. This configuration will delete any route for this interface in the current routing table.
